Chapter 4:
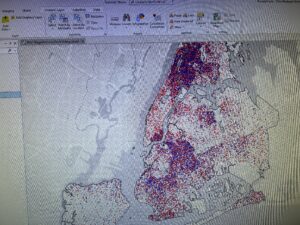
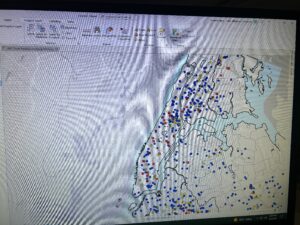
Mapping density shows you where the highest concentrations of features are. These maps are useful for looking at patterns rather than locations of individual features and for mapping areas of different sizes. Density maps let you measure the number of features using a uniform areal unit so you can clearly see the distribution. This is especially useful when mapping areas which vary greatly in size (census tracts or counties).
Although you can simply map feature locations to see where they are concentrated, creating a density map gives you a measurement of density per area, so you can more accurately compare areas, or know certain areas meet your criteria. You can create a density map area on features summarized by defined area or by creating a density surface
- Two ways of mapping density
You can use a dot map to represent the density of individual locations summarized by defined areas. Each dot represents a specified number of features. The dots are distributed randomly within each area; they don’t represent actual features in that area. Dot density maps show density graphically rather than showing density value. You can use dot map to show density when you have many clustered features. A density surface is usually created in the GIS as a raster layer. Each cell in the layer gets a density value, such as number of businesses per square mile, based on the number of features within a radius of the cell. This approach provides the most detailed information but requires more effort
- Mapping density for defined areas
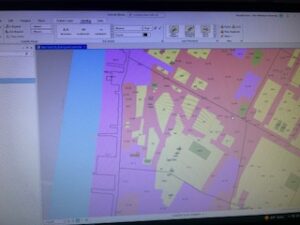
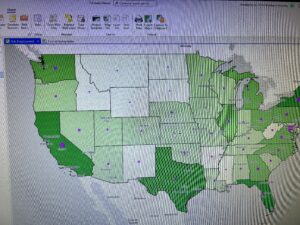
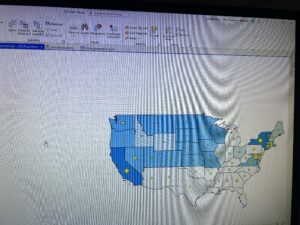
With this method, you calculate density based on the areal extent of each polygon. First, add a new field to the features data table to hold the density value. Then, adding the density values by dividing the value you’re mapping by the areas of the polygon. If the density units are different from the area units, you’ll need to use a conversion factor in the calculation to change the area units to the density units. Density by defined area is usually displayed as a shaded map, using a range of color shades with one or two hues. In this case density is treated as a ration and is mapped like any other ratio map. Some softwares lets you calculate density on the fly by specifying the value you’re mapping density for and the attribute containing the area of each feature. The GIS then calculates the density and shades accordingly. Density value for each polygon applies to the entire polygon. The actual density at any given location within the polygon may vary greatly from this value. This is especially true for large polygons
- Creating a density surface
The GIS calculates a density value for each cell in the layer. Density surfaces are food for showing where pint or line features are concentrated. The GIS defines a neighborhood around each cell center. It then totals the number of features that fall within that neighborhood and decides that number by the area of the neighborhood. That value is assigned to the cell, the GIS moves on to the next cell and does the same thing. This creates a running average of features per area, resulting in a smoothed surface.
Chapter 5:
People map what’s inside an area to monitor what’s occurring inside it or to compare several areas baked on what’s inside each. This allows for people to discern whether they should take action. Summarizing what’s inside each of several areas lets people compare areas to see where there’s more and less of something.
To find what’s inside, you can draw an area boundary on top of the features, use an area boundary to select the features inside and list or summarize them, or combine the area boundary and features to create summary data. You need to consider how many areas you have, and what type of features are inside the areas.
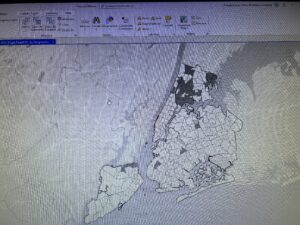
- Three ways of finding what’s inside
Finding what’s in a single area: finding what’s inside a single area lets you monitor activity or summarize information about the area. Multiple areas: finding how much of something is inside each of several areas lets you compare the areas. discrete features are unique, identifiable features. You can list or count them, or summarize a numeric attribute associated with them such as locations, linear features, or discrete areas.
- Drawing areas and features
Drawing areas and features: Good for finding out whether features are inside or outside an area. Locations, lines, areas, surfaces. Trade Offs: Quick and easy but visual only so you can’t get information about features inside. Selecting the features inside the area: Good for getting a list or summary of features inside an area. Locations, lines, areas. Trade Offs: good for getting info about what’s inside a single area, but does not tell you what’s in each of several areas (only all areas together). Overlaying the areas and features: Good for finding out which features are inside which areas, and summarizing how many or how much by area. Locations, lines, areas, surfaces. Trade Offs: good for finding and displaying what’s within each of several areas, but requires more processing
- Selecting features inside an area
With this method you specify the features and the area. GIS checks if each feature is inside the area and flags ones that are. You can also use this method to find what’s inside a set of areas you are treating as one. However, the GIS doesn’t distinguish which area each feature is in, only that it’s in one of them. Geographic isolation is also a quick way to find out which features are within a given distance of another feature.
- Overlaying areas and features
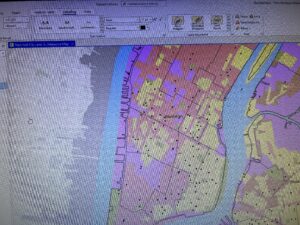
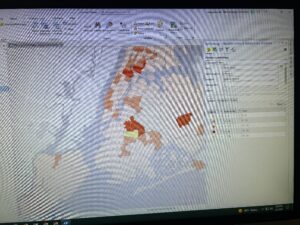
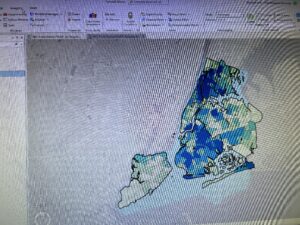
Overlaying areas with discrete features: GIS tags each feature with a code for the area it falls within and assigns the areas attributes to each feature. GIS checks to see which area each feature is in and assigns the areas ID and attributes to the features recorded in the data table. Overlaying areas with continuous categories or classes: GIS summarizes the amount of each category or class features falling inside one or more areas. You can get a map, table or chart of the results. GIS uses either a vector or a raster method to overlay areas with continuous categories or classes. Overlaying areas with continuous values GIS can summarize the values and create a map or table of summary statistics for each area. These include mean, minimum value, maximum value, value range, standard deviation, and sum. You can create a chart from the table to compare areas based on a particular statistic.
Chapter 6:
Using GIS, you can ding out what’s occurring within a set distance of a feature.
Traveling range is measured using distance, time, or cost. Knowing what’s within traveling range can help delineate areas that are suitable.
Defining your analysis: to find what’s nearby, you can measure straight-line distance, measure distance or cost over a network, or measure cost over a surface. Defining and measuring near: what’s nearby can be based on a set distance you specify, or on travel to or from a feature. When a surrounding feature is within a feature’s area of influence, measure using straight line distance. When movement or travel between the source and the surrounding features happen, measure over a geometric network. Distance is one way of defining or measuring how close something is, but nearness doesn’t have to be measured using distance. You can use cost to measure distance (i.e. travel costs). If you’re mapping what’s nearby based on travel, you can use distance or cost. Costs give a more precise measure of what’s nearby than distance but depending on the situation, distance can be more sufficient. Planar method: some analyses calculate distance assuming the surface of the earth is flat. Appropriate for small areas; city, country, or state. Geodesic method: some analyses calculate distance taking into account the curvature of the earth. Appropriate for large regions; continents, entire earth. List; an example of a list is the parcel ID and address of each lot within 200 ft of a road repair project. Count: a total or count by category. For example, the total number of calls to 911 within a mile of a fire station over a six-month period, or number of calls by type. Summary statistic examples: total amount, such as the number of acres of land within a stream buffer. Amount by category, such as the number of acres of each land cover type within a stream buffer. Statistical summary such as an average, minimum, maximum, or standard deviation
You can specify a single range or several ranges using inclusive rings or distinct bands. Inclusive rings are useful for finding out how the total amount increases as distance increases. Distinct bands are useful if you want to compare distance to other characteristics.
- Three ways of finding what’s nearby
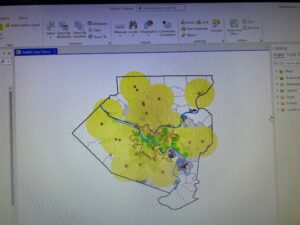
Straight line distance, you specify the source feature and the distance and the GIS finds the area or the surrounding features within the distance. This is good for creating a boundary or selecting features at a set distance around a source. You need a layer containing the source feature and a layer containing the surrounding features. Use straight line distance if you’re defining an area of influence or want a quick estimate of travel range. Distance or cost over a network, you specify the source locations and a distance or travel cost along each linear feature. The GIS finds segments of the network are within the distance or cost. You can then use the area covered by these segments to find the surrounding features near each source. This is good for finding what’s within a travel distance or cost of a location, over a fixed network. You need the locations of the source features, a network layer, and a layer containing the surrounding features. Use cost or distance over a network if you’re measuring travel over a fixed infrastructure to or from a source. Cost over a surface: you can specify the location of the source features and a travel cost. The GIS creates a new layer showing the travel cost from each source feature. This approach is good for calculating overland travel costs. You need a layer containing the source features and a raster layer representing the cost surface. Use Cost over a surface if you’re measuring overland travel
- using straight line distance
Using straight line distance: create a buffer to design a boundary and find what’s inside it. Select features to find features within a given distance. Calculate feature-to-feature distance to find and assign distance to locations near a source. Create a distance surface to calculate continuous distance from a source. Creating a buffer: to create a buffer, you specify the source feature and the buffer distance. For locations, the GIS draws a circle of a radius equal to the distance you specified. For linear features, the GIS draws a line around the features at the specified distance. For areas, the GIS draws a line around the feature at the specified distance. For areas, the GIS draws a line at the specified distance from the boundary- rather than the center of the area. Finding features within several distance ranges: If you want to know which features are within several distance ranges of the sources as inclusive rings, you have to create several separate buffers and select the surrounding features for each.
- Measuring distance or cost over a network
Measuring distance or cost over a network: GIS identifies all the lines in a network, within a given distance, time, or cost of a source location. Source locations in networks are often termed centers because they usually represent centers that people, goods, or services travel to or from where you can then find the surrounding features along, or within, the area covered by those lines. Specifying the network layer. A geometric network is composed of edges (lines), junctions, and turns. Turns are used to specify the cost to travel through a junction. To get accurate results, make sure: edges are in the right place, use edges that actually exist, edges connect to other segments accurately, and use the correct attributes for each edge. Setting travel parameters: In addition to specifying the cost for individual segments, you can specify the cost for turns from one segment onto another or for stops at an intersection.
- Calculating cost over a geographic surface
Calculating cost over a geographic surface: Calculating cost over a surface lets you find out what’s nearby when traveling overland. With this method, the GIS creates a raster layer in which the value of each cell is the total travel cost from the nearest source cell. Calculating cost over a surface also shows you the rate of change. Specifying the cost: Cost can include time, money, or some other cost. To calculate cost over a surface, you specify the layer containing the source feature and a second layer containing the cost value of each cell. To create a cost layer based on several factors, you combine all the input layers. Getting the information: Once the GIS has created the cost distance layer, you can either identify the area within a specific distance of the source features or summarize how much of something is within the distance. If you’re mapping discrete features with the cost distance surface, you can show them on top of the distance grid. The distance grid is displayed using graduated color