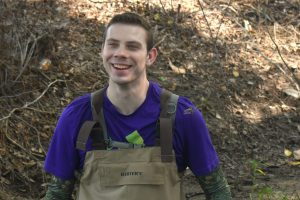
My name is Aiden Walz. I am a junior who just transferred from Columbus State Community College. I am from Blacklick, Ohio. I am majoring in biochemistry with a minor in environmental science.

Picture of me after getting injected with lidocaine at the dentist.
After I took the syllabus quiz I started to read the first chapter of Nadine Schuurman GIS: A Short Introduction. This first chapter provides a wonderful introduction and insight of how GIS has impacted our lives along with providing a brief history of how GIS came to be. With Canada creating the first true operational system, drawing inspiration from people like Ian McHarg who manually mapped multiple map layers of a suburban development so he could find the most optimal route for a highway. However GIS is more than just a program to find the best routes for highways. GIS has allowed users a better means of spatial analysis especially with geographical visualizations of areas which can be highly important to not just local counties trying to lay infrastructure down but also allowing users to visualize complex data into a visual representation. GIS is also wonderful in that it’s hard to just list a single overall use as GIS is such a versatile tool that has allowed humanity to visualize these spatial entities that would be hard to view otherwise. Schuurman also does a wonderful job of showing how GIS uses quantitative data and spatial visualization to make the data more accessible and impactful in people’s everyday lives. This chapter does however leave the reader with one question; what area isn’t GIS useful for? Throughout this chapter it becomes abundantly clear that GIS is useful for a multitude of areas, ranging from agriculture to waste management, climate change to infrastructure, and even as a tool for sociologists to understand humanity itself better. In the end, this chapter showcases that GIS is not just a tool to look at land a little bit differently, but a piece of revolutionary technology that has and will continue to help humanity answer questions, solve problems, and change humanity’s outlook on the world.
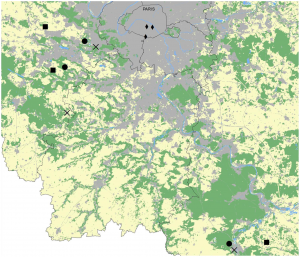
Application 1: The first application I looked at was how GIS was used to map Bigfoot sightings across the United States. This map was set up mainly for visual purposes and less for analytical purposes. However it could be used to filter these sightings by geography or other variables in order to focus on one aspect of these sightings or to limit the amount of possible ‘credible sightings’. Interestingly enough, there are quite a few sightings in Florida, which is quite interesting as I don’t know how a giant beast with fur would be able to survive in the heat, and also while still remaining elusive.
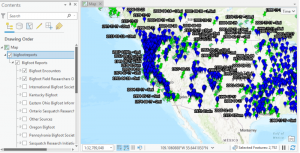
Source: Geospatial Training Services, Introduction to GIS Analysis using Sasquatch Sightings
https://geospatialtraining.com/introduction-to-gis-analysis-using-sasquatch-sightings/
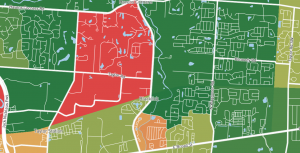
Application 2: The next application I looked at was crime per capita in Blacklick, Ohio. This map showcases the crime rate in the areas surrounding Blacklick, with more red colors indicating a higher percent of crime committed in that area. This GIS map helps illustrate the safety of the area and surrounding areas which can be helpful to home buyers, residents, and even law enforcement. This application can also further help by raising awareness of crimes and alerting the public to address safety concerns. Overall Blacklick got a B+ for safety and ranked in the 76th percentile for safety.
Source: Crime Grade, Violent Crime in Blacklick
https://crimegrade.org/violent-crime-black-lick-oh/


 < Could be asked of many gilly creatures. What about whales and their blowhole?