Chapter 9:
- Tutorial 9-1: Learned how to use buffers for proximity analysis, run the pairwise buffer tool, select block centroids within buffers, and sum the number of a population
- Tutorial 9-2: Learned how to create and use multiple-ring buffers and use spatial overlay to get statistics by buffer area
- Tutorial 9-3: learned how to create multiple-ring service areas for calibrating a gravity model, create multiple-ring service area polygons, spatially join areas and pool tags, calculate pool use statistics for service areas, make a scatterplot, and fit a curve to the gravity model data points
- Tutorial 9-4: learned how to use network analyst to locate facilities and analyze optimal solutions
- Tutorial 9-5: Learned how to perform data cluster analysis and interpret the clusters
Chapter 10:
-
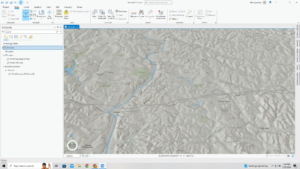
- Tutorial 10-1: learned how to process raster datasets, examine raster dataset properties, import a raster dataset into a file geodatabase, set the geoprocessing environment for raster analysis, extract land use using a mask, symbolize a raster dataset using a layer file, create and symbolize hillshade for elevation, use hillshade for shaded relief of land use, and create elevation contours
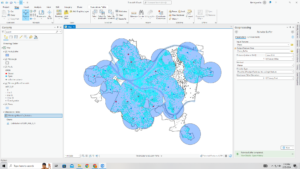
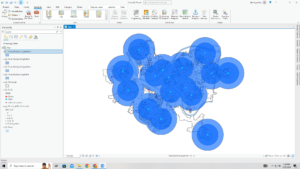
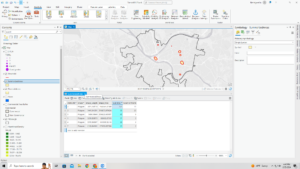
- Tutorial 10-2: learned how to make a density heat map, study the project location, run KDS, create a threshold contour layer for locating a service, use threshold areas to estimate data rates
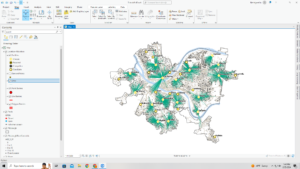
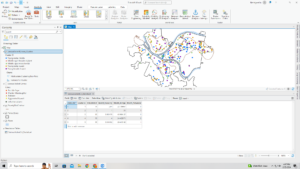
- Tutorial 10-3: learned how to build a risk index model explore the project area, standardize an input attribute, set the geoprocessing environment for raster analysis, create a new toolbox and model, add processes to the model, configure a kernel density process, configure the raster calculator process, run a model in edit mode, symbolize a KDS raster layer, and save its layer file, add variables to the model, use in-line variable substitution, use layer file to automatically symbolize the raster layer when created, and run a model tool
- Notes: for some reason when I ran my model it didn’t look like the pictures in the book
Chapter 11
-
- Tutorial 11-1: Learned how to explore a global scene and its properties, navigate a scene with a mouse and keyboard keys, change the basemap, and exaggerate and apply a shade and time to a surface
- Tutorial 11-2: learned how to create a local scene and TIN surface, set a local scene, create a TIN surface, change the scene’s surface and coordinate system, change the symbology of a tin
- Tutorial 11-3: learned how to create z-enabled feature classes, digitize data and objects on surfaces using z-mode, display data and objects realistically
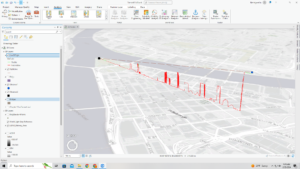
- Tutorial 11-4: learned how to create features and line-of-sight analysis using lidar data, create a LAS dataset, generate a raster DSM and DTM, create an nDSM raster, create random points for buildings, add surface information to random points, assign maximum value (height) to random points, join maximum z-value (height) to building footprints and display as 3D buildings, use lidar to determine bridge elevation heights, draw a bridge using Z Mode elevation, conduct a line-of-sight analysis
- Notes: something went wrong with running the different tools because my 3D Bldgs layer did not produce a lot of tall buildings. When I was entering in the information in the varying tools it was taking a long time to process on ArcGIS Pro, so I think that might have been where the issue was. The bridge section seemed to give me a lot of issues that I couldn’t figure out. For some reason, I did not have the layers that the 11-6 tutorial was asking me to turn on for the Smithfield Street section so I did not get to complete that section.
- Tutorial 11-5: learned how to work with 3D features, extrude floors, use a range slider to view building floors edit a building’s height using dynamic constraints and the attribute table
- Tutorial 11-6: learned how to use procedural rules and multipatch models, apply building rules using stacked blocks, apply an international building rule, view multipatch models of buildings and street furniture
- Tutorial 11-7:learned how to create animation, add an animation to the project and create keyframes, play an animation and change the duration, create a pause, add and delete keyframes, create a movie from the animation
Screenshots: