Chapter 9:
This chapter introduced the Service Area Layer tool, which allowed you to add a network of things together. Overall, I didn’t have too much trouble with this chapter. I had some trouble with 9.3 because I could not add the new fields to create the scatterplot. I’m not really sure if it was an issue on my end or a bug in the tutorial. I also selected sum for the DemandWeight in 9.4 but I didn’t notice anything happening or change. I’m not sure if J was supposed to see a change or not. One thing new this chapter mentions is K-means which is used for clustering. I noticed under the clustering method that there were also k medoids. I’m curious what they could be for.


Chapter 10
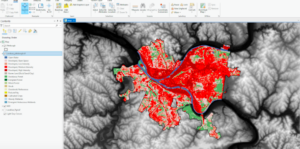
This chapter introduced some new concepts and tools. One was the Kernel Density Smoothing tool which allowed you to smooth data spatially. We also got a chance to use ModelBuilder and build models in ArcGIS Pro. I think this tool could be really helpful if you are creating something for an employer. Additionally, the drop shadow under the process and output boxes symbolizing they have been run is neat. The Validate button can also be used to ensure they are ready to run again or edit. I ran into a few issues with FHHChld weight and NoHighSchoolWeight. I learned that you have to click save before rerunning the model for there to not be error marks by these parameters. I eventually got model to work

Chapter 11
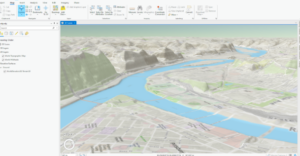
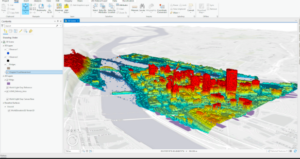
I really enjoyed learning the keyboard shortcuts for moving around the map in this chapter. You can use J for down and U for up, A to go left and D to rotate right ,W and S tilt up and down , and B+move mouse allows you to look around in one spot sort of like a 360 tour video. By selecting Map properties for 3D-> illumination-> date and time, you can see the shadows and 3D features of the map in real time, which I thought was cool. I thought it was cool how we were able to display 3D images on the map like the trees. We also used the Create LAS Dataset tool in 11-4 which made a really cool 3D model of the city. I thought it was cool how we could modify the scale of the building in section 5. This was done by selecting Modify under the edit tab and the clicking scale on the pane that popped up. This would be really helpful if you were trying to design a new building.
My most favorite lesson from this book was section 7 where it goes over how to make a animation with the bookmarks. I thought that this was both really cool and something I could definitely see myself using in the future for an employer project. We were able to make the animation by going to manage bookmarks, then clicking the add button under animations on the view tab. Next, we clicked create first keyframe and then clicked the first bookmark. After selecting the second bookmark we clicked Append Next Keyframe at the bottom to add it to the animation. After repeating this with all the bookmarks, they were strung together into a short clip. You can also make it pause on a scene by clicking the scene and selecting hold. Click insert after moving to a different location on the map to make the animation go to that area.