Datta – Week 3

i read the chapters 🙂

CHAP 4

  • Map density shows where the highest concentration of features is
  • Useful for looking over patterns as opposed to individual features
  • Density maps allow for one to look at features with a higher concentration than others
  • These kinds of maps are highly useful when varied by size
  • You can differentiate between defined areas or just density size
  • You will need to include conversion factors in calculating density if map units is different than density units
  • If defining density by a specific region, you run the risk that density might change in a given space and not remain uniform throughout
  • Dot maps are density maps which use dots to represent density, 1 dot per a certain amount of the count.
  • GIS can be used to summarize feature values within polygons
  • Cell size: defines how course the patterns are, needs to be goldilocked to balance pattern definition with storage saving
  • Search Radius: affects generalization of patterns
  • There are 2 methods to generate density maps; the “simple” method and the “weighted” method.
  • GIS lets you specify areal units, which are the unit the map measures itself in (i think?)
  • Centroids: density surface map feature which allows you to define an area
  • Contour lines and colors both often used for map density
  • Density maps show us how values vary across regions of a map as well as distribution of samples
  • Sometimes density map data can be inaccurate; if you are studying how many employees there are, the suburbs would be empty because there are no businesses in them

CHAP 5:

  •  Mapping an area helps us monitor what occurs within it
  • Data must be analyzed based on whether it is a singular discrete area or multiple areas/continuous areas
  • Data for analysis can be arranged as either a list, count, or summary
  • There are three ways of figuring out whats inside
  • method 1: drawing area and features. Requires a dataset with a boundary of an area, good to see whats inside of it
  • method 2: selection of the features inside the area. needs a dataset with a boundary like above, but also all of the attributes you want to summarize. its good for getting a list of summaries from within 1 group
  • method 3: overlaying areas and features. this method requires the same things as the above method, good for finding which features are in each of several areas
  • Method 1 is only visual, method 2 only works for one area, and method 3 requires the most processing
  • maps can be made by drawing features in different or same symbols
  • Discrete areas can be made by either shading the area in on top of other boundaries or by making the boundary of the area thicker than surrounding ones or by doing both
  • You can select different parcels within your area for summarization
  • Count: a summary which shows the total number of features within an area
  • Frequency: a summary which shows the number of features with a given attribute or value inside an area. This is displayed most commonly as a table, but can be turned into a pi chart
  • The most common numerical summaries are:
    – SUM: all of the features numerical values added together
    – Average, AKA mean: the sum of the numerical values divided by the amount of features
    – Median: The absolute middle value of the numerical values
    – standard deviation: showcases how much the values stray from each other.
  • You can overlay features on top of each other

CHAP 6:

  • Mapping nearby areas helps to identify the area, and may be useful for study- like a study on travel distances or trying to plan a walkable city or any other sort of example
  • “nearby” is based on a distance set by you, either whatever is in the source feature’s area or within a certain amount of travel from the area
  • nearby can also be measured by “cost”, such as how long it takes someone to get through heavy traffic
  • analysis differs depending on if you’re accounting for the curvature of the earth
  • You can specify a single range or several ranges
  • “Inclusive Rings” are used to see how total amounts increase as distance increases
  • “Distance Bands” are used to compare distance to other characteristics
  • There are three ways of mapping what is nearby:
  • Method 1: Straight line distance. Specifies a source feature and the distance and GIS finds the area or surrounding features within it, presumably with just a straight line. Requires a layer containing source feature and surrounding features.
  • Method 2: Distance and/or cost over a network: Specifies source locations and a distance or travel cost between them using linear features. You can use the featured segments to find surrounding features.
  • Method 3: Cost over a surface. You specify the location of source features and travel cost, allowing GIS to make a new layer showing travel cost from each feature. Requires a layer containing source features and a raster showing cost surface.
  • You can create a buffer by specifying source location and buffer distance- this creates a line around the feature(s). You can even have the GIS sense when these overlap and create a single buffer area out of all of them.
  • With the buffer you can specify only the feature points within the buffer, allowing for analysis of data within
  • You can create seperate buffers per range and overlap them with inclusive rings, or have GIS make multiple distance bands
  • You can also use selection to specify points within a range, which works similarly to buffer selection methods
  • You can have GIS ID the actual distance between two locations
  • You can specify maximum distance in which locations can be included
  • GIS can also identify nearby networks, such as streets
  • It can also also ID across a geographical surface such as streams or mountains

Datta – Week 2

I read the chapters 1-3 in The ESRI guide. Here are my takeaways and notes:

CHAPTER 1:

  • GIS can be used to effectively analyze geographic information; to me, this seems useful for large scale disciplines like ecology and sociology
  • Discrete features: features which are location locked. I think this would be stuff like a river.
  • Continuous features: features which could be measured anywhere. The textbook uses the example of temperature for this.
    • Can be mapped as areas enclosed in boundaries, where the points within a boundary are all the same (or are not significantly different)
  • Data can also be linked to places, for example a US map color-coded by number of cows. I think the data in these maps might not be as specific this way as its averaged in a larger area, but they seem easier to read than the alternative, which would be useful for communicating data to someone who isn’t as good at reading maps.
  • Vector: Each feature mapped by X and Y coordinates located within a table.
  • Raster: a collection of cells. This is typically continuous, whereas vectors are discrete.
  • Categories: Groups of similar things
  • Ranks: Features put in a high-low order.
  • Counts, Amounts: show total numbers
  • Ratios: Relationship between 2 quantities of 2 things
  • Ranks and Categories are discrete, Counts amounts and ratios are continuous
  • Tables can be messed with similarly to how tables in a spreadsheet are messed with.

    Chapter 1 questions:

  • The textbook seems to differentiate between vector’s x/y axes and general coordinates. If these are not the same, how do you obtain vector points within a map?
  • GIS so far has been mapped to 2d maps; the textbook briefly mentions Lidar, a 3d mapping technique. How does that function with GIS?
     

CHAPTER 2:

  • Maps can be used to determine the patterns within a geographic region
  • Categories should be tailored to the audience of the analysis; for example, a map in a research paper could be more detailed than one for newspaper.
  • A map should also be readable; a small map in the corner of a report fits less detail than a map for a poster.
  • GIS uses either street addresses and latitude-longitude to assign geographic coordinates
  • Most categories are hierarchical with subcategories
  • In some cases, 1 code defines both category and subcategory. In others, these are separated in the code
  • Each type of data will be drawn by one “symbol” (presumably, this will make sense when I start doing GIS work) each, and assigned a category value.
  • GIS will, after the previous note’s step is taken, draw the features you specified in the program.
  • Subsets of data are used for individual locations more often than linear or continuous data, because subsets of those would result in incomplete seeming data, and/or context-less data.
  • You do not want to showcase more than 7 categories visually on a larger map, because people can usually only visually understand up to 7 points of data.
  • The above statement is less true for a smaller map, and in fact keeping too little within the map would be too little information.
  • How you group categories can very easily change how a reader interprets your work.
  • There are three ways to group categories: one is to put 2 columns in a table for specialized and generalized categories and to group each category individually, second is to code all specialized categories into certain generalized codes, and third is to assign the same symbol to various specialized code, which you can label however you wish.
  • Linear categories shouldnt be separated by color, instead by a textural difference which is easier to read.
  • Colors also need to be distinguishable to each other, and text labels are often used.
  • Reference features shouldn’t be too clashy with the rest of the map.

Chapter 2 questions:

  • Presenting data simplified in a certain way can cause bias; but not simplifying it at all can lead to overwhelming my audience. What is the best course of action to create an as-unbiased-as-possible report?


CHAPTER 3:

  • Mapping most/least allows for an understanding of where to take action from, as well as to understand relationships between the two extremes
  • Mapping numerical values also allows us to more easily figure out the answers to the questions we ask with GIS
  • Discrete numerical features can represent singular points, linear features, or areas; the former two represented with graduating symbols and the latter with color coding.
  • Continuous values are defined either by a specific area (like a county or a state) or by certain value (“region where value = x”)
  • When focused on exploring the data, you’ll want to keep your data specific. When you’re more focused on presentation, generalizing becomes a better idea.
  • COUNT: actual number of features on a map (“there are 12 bananas on this map”)
  • AMOUNT: value associated which each feature (“This feature has 14 bananas within it”)
  • Ratios divides one quantity with another, which can help evening out skewed data if one area is larger than the other.
  • Proportions are what part of the whole your data represents
  • Densities show concentrations within the data
  • Ranks compare data relatively in ways assigned by the GIS operator and not by math
  • Classes are groups of numerical values, such as ranges in which your specialized data would sit.
  • Individual value mapping is better for interpreting raw data
  • Classes can be made manually or with a classification scheme
  • Classification schemes: Natural breaks/jenks (naturally grouped), Quantile (equal amounts of data sets in each class), Equal Interval (equal ranges in each class), and standard deviation
  • Natural breaks is best if the data is uneven, st. dev and equal interval is best if its even and you want to emphasize difference between features, and quantile is best for relative differences
  • Outliers can be put into their own class, grouped together in an outlier class, or shoved into the nearest class.
  • Data should be simple enough for readers to understand.
  • Graduated symbols and colors tend to make the largest/most complicated and the darkest colors the “most” value.
  • Charts can summarize data in an area and show a little more data
  • Contour lines show change in values across spatially continuous data
  • 3D commonly used with continuous views as well (doesn’t feel like it’ll be used for the class?)

Chapter 3 Questions:

  • How might numerical value be classed as significant or insignificant beyond a “yeah that looks important”? Does GIS allow for usage of statistical tests?

Datta – Week 1

Hello! I’m Kheya Datta, I’m a 3rd year B.S in Biology with a minor in ENVS. Here’s a silly little drawing of me that I drew because I dont have any good photos of myself:


I did the Syllabus Quiz and read the reading.

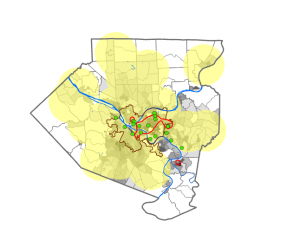
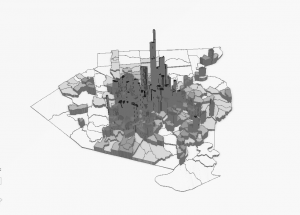
This introductory chapter starts by talking about the recent boom of GIS; when in the past GIS was only particularly useful to a select group of Geographers, now its used worldwide by all sorts of people from Police to Starbucks. It then discusses GIS’ history from analog to digital. The discussion of the history reminds me of my Mother; she is a Geography Masters, and partially due to the times and partially due to studying in India, she only knows analog style GIS. Then it discusses various predecessors to the modern GIS systems we know today. GIS appears to have been based around Quanitative methods of previous years, and lead to a revolution within this form of methodology in ways I’m excited to learn more about in the upcoming semester. Next it discusses GIsystems vs GIscience. GIsystems seems to me to be more useful for the everyday person; I’m sure someone studying something with GIS doesn’t want to particularly worry about GIS being faulty, and GIscience seems more useful for people trying to input their own data within GIS for deep-delves into research, beyond what is already available. It then goes into spatial data and then who uses GIS and for what. They discuss a lot of city planning and road building in this section, which fascinates me. My limited experience with GIS is solely in the physical geography, specifically hydrology amongst rivers, so it’s interesting to learn how GIS is used in the urban side of things as well. The mention of how GIS gets its data does make me wonder how GIS has been used in a political light, especially in our day and age.

I’m really interested with Harmful Algae Blooms with my work, so I’ve found the NOAA Harmful Algae Blooms website for perusing. HABSOS can be used to predict upcoming Harmful Algae Blooms in the Gulf of Mexico (if it blooms last year it’ll probably bloom this year) and for the tech savvy consumer it could be a very good source for if there’s currently a harmful algae bloom. One of the things it tracks is Microcystins, a really bad toxin, so if a beach-goer sees thats high they can make the safe decision to not go.

NOAA National Centers for Environmental Information (NCEI) (2014). Physical and biological data collected along the Texas, Mississippi, Alabama, and Florida coasts in the Gulf of America as part of the Harmful Algal Blooms Observing System from 1953-08-19 to 2024-03-25 (NCEI Accession 0120767). NOAA National Centers for Environmental Information. Dataset. https://www.ncei.noaa.gov/archive/accession/0120767. Accessed 8/21/2025.