Chapter 7
Chapter 7 was devoted entirely to editing existing features and creating new features, which turned out to be one of the most practical chapters so far in this tutorial. The tutorial has managed to cover a major portion of creating, moving, modifying, and deleting polygon features, which is quite different from what we have been doing so far in this tutorial.The chapter focused our attention on the fact that sometimes we, as GIS users, need to create our own spatial data. One of the most beneficial features of the tutorial is the use of the Modify Features pane, especially in choosing the vertices of specific buildings and making modifications to them as desired. We were taken through the tutorial step by step on how to utilize the Move, Rotate, Continue Feature, Reshape, and Split features, which showed us just how flexible ArcGIS Pro is, especially in making modifications to our features. We also learned the significance of precision in choosing our features because we need to be precise in choosing the feature that we would like to edit; otherwise, if we click slightly away from the feature, we may end up choosing the entire layer instead of the specific polygon. The most intriguing feature of the tutorial is the use of the smoothing edges feature. We learned how we can utilize the feature of smoothing edges on our features so that our features will be smoother instead of having jagged edges.Overall, this chapter helped me understand more about how GIS data is created, updated, and even corrected. I can definitely see myself using these tools again, particularly with any future assignments that require creating my own data or modifying data that already exists.
Chapter 8
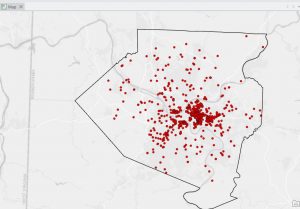
Chapter 8, like the last chapter, was short, and I feel like I have a much greater understanding of what geocoding is, particularly. It explained to me that geocoding is the process by which a set of location fields, such as street addresses or ZIP codes, is matched to the corresponding locations within a feature class. It also walked me through the steps necessary to use the ZIP code data, which is a simpler process, but then went on to explain how to use a full table of street addresses with an address locator. What I think this chapter did particularly well was to explain each part of the process within the Geo processing pane, making it easy to understand the relationship between the table, the locator, and the feature class. It also explained to me the importance of reviewing the addresses before geocoding to make sure they correlate with the locator. Should the addresses not correlate correctly, then the percentage of matches will decrease, resulting in a potentially incorrect outcome. It also showed how to view the matches once the geocoding is done. Another useful section for me was the part where I learned how to add the newly geocoded points to the map and visualize their distribution. While this chapter focused more on the process of creating the points, there was still a lot of emphasis on the importance of visualization when reviewing the results to spot possible errors. As this chapter used both ZIP codes and addresses, there was a distinction between coarse-level and fine-level geocoding. This will likely prove to be useful later on in the course, as accurate location information is the basis for almost all types of analysis. I can certainly foresee this chapter proving useful to me when working on the final project or any assignment with a table that includes spatial data.
Chapter 9
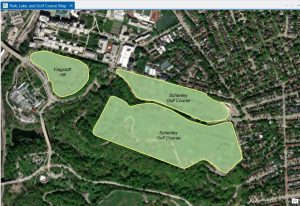
Chapter 9 described one of the most used GIS tool types; buffer analysis. This chapter is one of the longer and more detailed ones because there are many ways of proximity measurement with geo processing tools. The chapter began with a tutorial on how to create a basic buffer around a feature at a specified distance and how the result differs when features are dissolved or not. The chapter also taught how to create multi-ring buffers and how to visualize data at different levels of proximity. This was a good approach to understanding how proximity affects data from a point or a polygon feature. The chapter also taught how to use various tools in the Geo processing pane. The chapter was also good at emphasizing the importance of setting input layers, choosing output locations, and making sure all parameters are filled out when running a tool. The chapter was also good at emphasizing the importance of keeping track of geo databases so that output layers are not lost, which can easily happen. What I thought was most interesting was how this chapter taught how buffers are a fundamental tool in many real-world analyses, including the ones in this chapter. The chapter taught how proximity could be used as a tool for analyzing and understanding different types of analyses, such as creating zones, finding areas of interest, and preparing for later network analyses. Although this chapter did not go in-depth with network analyses, it did show how buffers are a subset of this type of spatial analysis. Chapter 9 gave me a better understanding of spatial relationships and how to create meaningful proximity layers with the buffer tool in ArcGIS Pro.