GIS Tutorial for ArcGIS Pro: Chapter 1
The first chapter takes you through step-by-step on how to complete the first tutorial through ArcGIS Pro. Downloading the chapter was easy once you learned how to do it, and I really liked how the process was so thorough. I completed Tutorial 1-1 and felt like I had a decent understanding of the rest of the work we had to do. It seems like the most there is to do is just following the directions, and that will be really helpful in the projects to come. Some parts were a little confusing and I had to go back and make sure I did everything correctly, so it seems like the biggest part of this is just making sure that you’re paying attention.
I also liked how it gave us examples of what the maps and graphs were supposed to look like! It definitely helped keep me on track. One of the biggest components was recognizing where everything was on the website. For example, the “Ribbon” at the top features most of the main functions, and that is what Chapter 1 seemed to focus on the most. I also liked the “Your Turn” parts of the demonstration as well, that truly helped me find where everything was and helped me remember, even though it simply just had you do the same steps again.
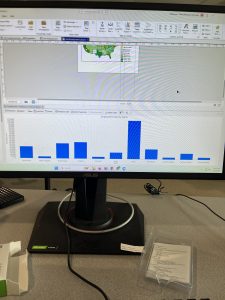
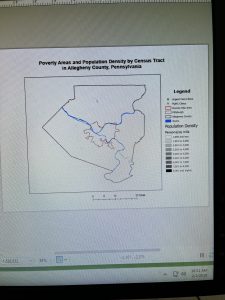
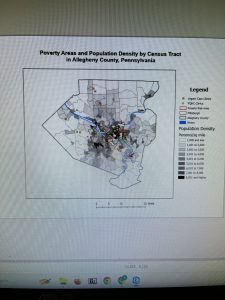
Tutorial 1 was focused on health clinics and the poverty and population densities, which was a good one to start. It was not overly complicated and the rest of the tutorials throughout the chapter removed different layers, added features, zoomed in on pixels, and things like that. It also told us how to select different FQHC’s using the control button, and that helped a lot. Overall I thought this section was pretty easy once you got into it! It did take a long time to get everything going, but after that it was good. I have attached two screenshots from my work throughout this chapter.
GIS Tutorial for ArcGIS Pro: Chapter 2
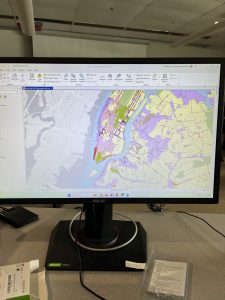
Chapter 2 was focused primarily on how to create a “thematic map”, which is defined as a map that tries to help define or solve a problem. There are a lot of layers that require attention to detail and “symbology”, which is when ArcGIS Pro uses attribute features and drawings to make figures on a map. I completed Tutorial 2-1, where we primarily focused on changing the different colors on a map of Lower Manhattan. I liked this section because it showed us how to change the color many times, and also gave us a shortcut on how to do it. It also gave me a way to check my work with the finished product located at the end of the tutorial.
I liked this tutorial because it then showed me how to change the different layers when you want one off or if you want a few more combined. We were able to change the Object ID in one of the next tutorials as well. This chapter also included the “Your Turn” sections, which was good to practice with too. Neighborhoods and the surrounding areas were the primary focus of this chapter, and I like how each one focuses on a different section and appearance. It’s cool that there are different maps for each specific problem or experiment that people are working on.
We also could do charts with this too! Tutorial 2-6 showed me how to make a histogram which was neat. I’m excited about using this for our final project in the future. This chapter did go by faster, I think because I had gone through the first one and kind of learned where everything was at. I was still having trouble locating things on the “Ribbon”, but I think it’ll just take some time to get used to. By the end of it, I was going through pretty well and was able to locate a lot of features. And all the colors were pretty! I attached a screenshot of my first tutorial of this chapter.
GIS Tutorial for ArcGIS Pro: Chapter 3
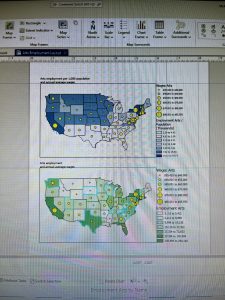
The final chapter for this section was a little more in-depth for me, but still went fairly quickly. I was able to easily access the tutorials through the ArcGIS Pro icon on the computer, and luckily I didn’t have any issues downloading the book onto my external hard drive (Hopefully it stays that way). And this tutorial was focused on making different kinds of maps, which was cool! I felt experienced by the end of it, especially in how to make bar graphs. The two maps were fun to play around with in Tutorial 3-1, and I felt like it helped me better understand how to create maps.
The first tutorial was longer but had a lot of useful steps. We were taught how to make a layout with two maps and two legends on it, which will be helpful for our final project. Again, I liked the “Your Turn” sections and how it let us complete a section without using direct instructions. It was informative on how to create titles and different papers within one project. I was confused at first on how to create another layout page, but I just had to look harder underneath the “Ribbon” and its underlying sections.
The chart was also a little difficult at first, because some of the instructions were in different numbers and I skipped over them by accident. However, I figured it out! I liked how we could do the Map Viewer on the website itself, and how it’ll eventually be uploaded into that section. It’s also nice how this book is so useful and easy to come back to if you need any help in the future. Learning how to create a briefing was neat, and even though this chapter began to get more in-depth, it was still fairly easy to navigate with the through instructions. I attached two screenshots of my work from this chapter as well.