Chapter 4: Tutorial 4-1 was about exporting features and I found it all to be fairly straight forward. We also used a lot of the data from the gdb, which was cool to learn how to do. The second tutorial was about attribute tables. I learned how to delete columns, add fields using the fields view tool, and joining/combining data and how to calculate the sum of fields. This tutorial was easy and I had no problems with it. 4-3 was about queries and I struggled with it at first. It kept telling me that my queries weren’t valid but I moved on and came back to it and had no problem. It showed me how to do a number of different things with queries and I ended up using them in the following chapters. 4-4 was about spatial joins and was quick and easy. The fifth tutorial taught me how to use the Feature to Point tool to teach me how to create a point layer. This tutorial was also easy. 4-6 was helpful because it had two different “your turn” sections which allowed to test what I had learned. Overall chapter 4 was easy and helped with what I did in the next 4 chapters.
Chapter 5: 5-1 was about correcting distortions on world maps. Because it is such a large space, and because the earth obviously isn’t flat, distortions are created on maps. I was able to learn how to help eliminate those in the first tutorial which was helpful. 5-2 was short and easy as it only covered one thing. I learned how to set a projected coordinate system, which helped me with the next tutorial. The third tutorial was also about coordinate systems but it showed me how to add layers, change coordinate systems and change the projected system. 5-4 taught me how to use multiple different tools in GIS. I learned more about exporting features, creating new layers from data, and adding X,Y coordinates. This tutorial was very helpful because I continued to use the export features tool throughout the tutorials. The fifth tutorial had me download data from another website to implement into a map. This is definitely something I will need to use again in the future so I’m glad I learned it now. I also learned how to sort through data and join data together to a table. The last tutorial for this chapter was one that I had trouble with. I was able to extract by mask and add the new data but I was unable to download data from the public agency website because the layer it told me to download was no longer an option. Other than that this chapter went fairly smoothly and was very educational.
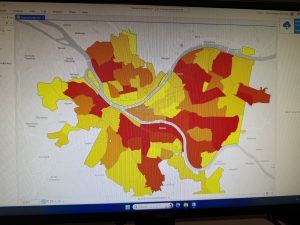
Chapter 6: Chapter 6 overall was the easiest chapter for me. I blew through it and had no issues. 6-1 was about dissolving fields in the attribute table and block groups. I felt very confident in this section because when I got to the “your turn” portion I was able to do what it said without looking back at the steps. 6-2 was about selecting and editing different layers. First I learned how to select by attribute and then by layer. I was also able to do this section easily without the steps. 6-3 was really short as it only went over one thing. It taught me how to merge feature classes into one. I did this with water and waterfront parks in NYC. 6-4 showed me how to append two different classes to an already existing larger class. This was similar to joing information except I added two to one larger one. 6-5 taught me how to use the Pairwise Intersect tool. This tool is helpful for putting data on streets/centerlines. The summarize feature allowed me to create a new attribute table with summarized length. 6-6 started with the Union tool which created new layers with smaller polygons with popups. This is good for neighborhoods. Then i used the Calculate Geometry tool and made a new definition query. I also did different things with the attribute table which was helpful for the next two chapters. The last tutorial had me zoom to different fire companies to study the polygons and different information on each. The last thing I did was learn to use the Tabulate Intersection tool which helped sort information on the attribute table. For the “your turn” section I used the summary statistic tool to find out the total number of disabled people which can be used for planning.

Chapter 7: 7-1 was all about using the move button. I moved buildings to line up with the basemap. For the second tutorial I continued to use the move tool but I also learned how to split and relabel things as well as trace the outline of something. 7-3 taught me how to make the harsh lines rounded for things like parks and bodies of water. The last section of chapter 7 was slightly more complicated. I added data to create a new layer and then moved it to a different section of the map. I couldn’t figure out how to turn on the different layers at first as there wasn’t a check mark next to them. Then I exported the features to a new feature class and deleted the original. That is when I rotated the building and moved it closer to the other parts of the map so that it wasn’t as large compared to in the photos.

Chapter 8: This chapter was very short, and I had no problems with it. 8-1 was about zip codes. I made geocode data by zipcode first and then rematched data by zipcode. I learned how to use new tools in this section which was interesting. The second tutorial taught me how to use the create locator tool and then match data. I also used the geocode addresses tool again and learned how to select minimum candidates and create matching scores.
