Chapter 3: Experience Builder
This is mostly for a more complicated way to create apps, maps, and more. Things an experience builder could include: components such as pages, windows, and outline views. It could also include various widgets such as functional & layout widgets. Widgets are classified into two groups, message actions & data actions. When using a message action, it listens to various triggers and performs assigned actions. For data actions, they provide actions to a button that users are able to click on, a usage could be to export records to a file.
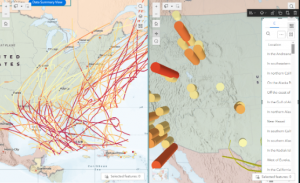
- Tutorial 1: Creating a basic webpage that included 2 different maps, an image, and methods of switching between the two of them through a view selector.
- Tutorial 2:This was more about how to create various actions for the data, in this case it was the action of making sure the the maps of 2d & 3d match, and with selections when the 2d points are selected, only those ones will appear on the 3d map. These are done by utilizing the action tab that appears once map tabs are selected under the outline window.
- Tutorial 3: This was mostly about how to add a text box that included statistics. It is fairly similar to things we have done in ArcGIS pro, except as a presentation-like format. From this point forward, I have realized I am messing up the styles/formats of the web experience, however I am going to just add the features & try to salvage it as best as I can.
- Tutorial 4: This tutorial was about how to create a table & how to make it so it displays certain fields in a specific order. Also adding a search bar & filters for the data.
- Tutorial 5: When adding a filter I will want to use an SQL expression to ensure that the map itself flows. I can choose various criteria that I want my maps to be filtered by. I got pretty lost halfway through, but from what I am able to judge, I am also able to make filters for the table that I had added in the previous tutorial & also be able to make a donut chart. And when going through the actions, I am able to trigger something to spawn a chart for various data that I give said chart.
- Tutorial 6: This felt like it brought everything that we have made together, and I believe I misunderstood some instructions referring to the cosmetic effects of the main page. This tab was about making a header & more pages with the ability to swap between them.

Chapter 4: Mobile GIS
There are many reasons why Mobile GIS is useful, such as mobility, locational awareness, ease of data collection, real-time info, large user volume, and many ways to communicate. GIS is useful in a bunch of different technologies. I will want to be careful in concern to the utilization of the web interface as phones are needing more simplistic designs. There are three main schools of thought when it comes to app development strategies:
- Browser based – which is using apps through mobile web browsers. This will be fairly limiting the user’s experience as it will not be utilizing the phone’s features.
- Native-based approach – which will be using a mole app, a disadvantage for that would be learning skills for the coding languages
- Hybrid-Based approach – A combination of both native & browser based approaches
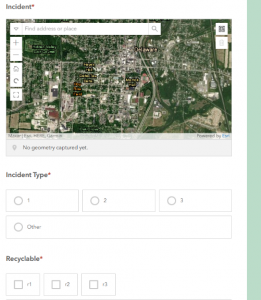
- Tutorial 1: To get to the ‘set rule’ option, go into edit, then find ‘behavior’. And instead of ‘If show’, go to the thing you want to see, and then select the conditional. This is very similar to a software such as Google Forms
- Tutorial 2: I thought it was fairly cool that I could use Survey123 to submit data from my phone. It seems fairly intuitive to collect data & be able to check them out using the page.
- Tutorial 3: I had gotten very lost early on in this section. I think it is because I screwed something up within the tutorial section for the surveys. However from what i can gather, thiss will be tying the survey itself to sync with a feature layer by going into where the survey is collecting responses. I can add a new field for the various different types of data being collected and make them appear as points on the map. And they will appear as lines within the map.
- Tutorial 4: Same issue as tutorial three, but here is what I was able to gather from the tutorial, this will be adding some form of visibility layer with conditional statements. This will be done by adding another layer, and adding various expressions to make it “Incident_Type == Pothole”, for example. And this will allow a user to filter the different types of data within the map.
- Tutorial 5: It appears that in this tutorial I am able to use another app in order to compile data to put directly into my field map rather than filling out a form to put into the map by using skills from tutorial 4.
- Tutorial 6: In tutorial 6 we are using the map created in tutorial 3, this will be using the quick capture software to do. And this will be a great way to include a user-friendly app interface that includes icons for each type of thing you want input on.
- Tutorial 7: This is just showing how to utilize what was made in Tutorial 6.
- Tutorial 8: Utilizing AR will be a way to add more context for the things made in the previous sections.
- Tutorial 9: Utilizing AR will be a way to add more context for the things made in the previous sections.

Application description based on Ch 3 & 4 using my data:
- Create a web experience. (Ch 3)
- Creating a survey form for a department to report suspicious activities will be a really good use for GIS tech, maybe creating something for Public Safety? (Ch 4)